
Devon Waistcoat
Photo guidance for steps 18 - 23.

18
Position the body and the lining RIGHT SIDES TOGETHER. Pin one of the armholes closed and sew at 1cm.

18.1
Turn the waistcoat out the right way by pulling the layers open.

18.2
Then post one layer through the armhole.

18.3
One armhole will now be sewn.

19
Lay your waistcoat out the right way with the layers sitting flat as worn. Peel back the front of the side with the unstitched armhole.

19.1
Pinch the front armhole notches of the body and lining together.

19.2
Then turn layers back so they sit RIGHT SIDES TOGETHER.

19.3
Pin to secure.

19.4
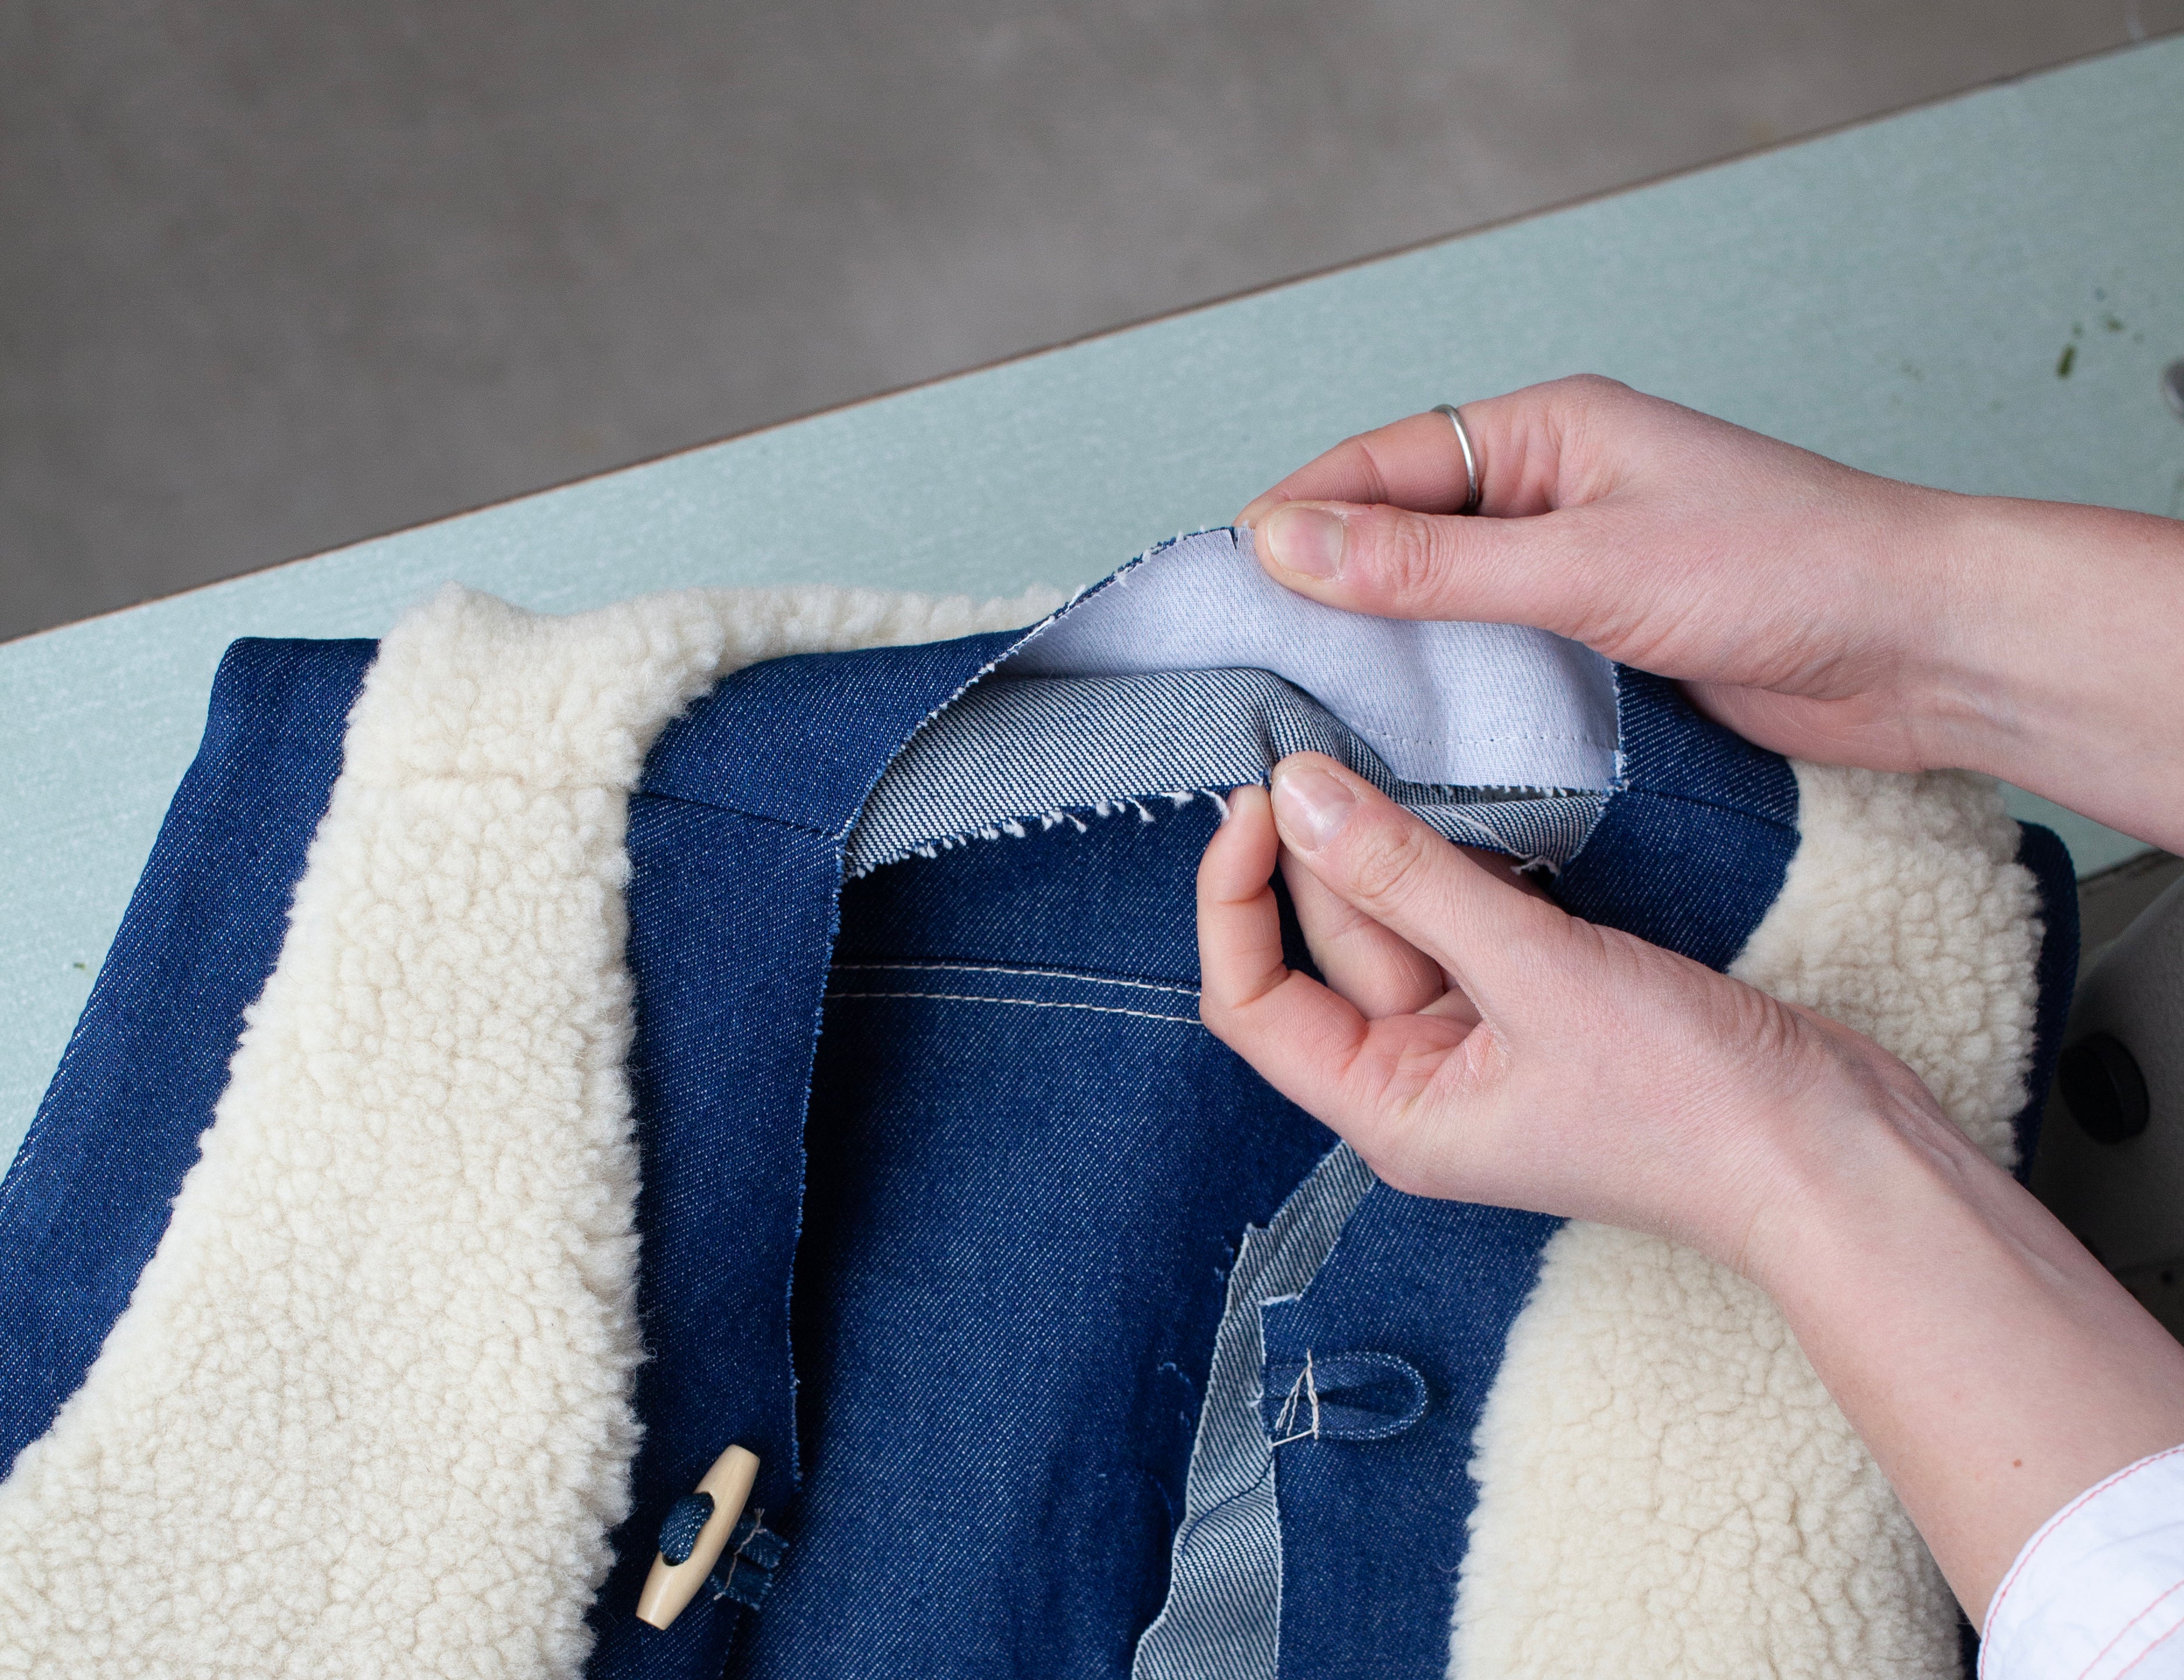
Move to the shoulder notch and repeat the process. Work from inside the body and lining layers to pin all the way around the armhole so the layers of the seam allowance are flipped back with the RIGHT SIDES TOGETHER.

19.5
The armhole will look roughly closed with pins from the outside

19.6
Carefully stitch around at 1cm, carefully moving through the layers of the garment.

19.7
Add some small snips into the seam allowance of the armhole seam to allow the curves to fold back nicely.

19.8
Then turn the waistcoat out the right way.

19.9
Carefully press both armholes to get a nice crisp edge.

20
Next pinch the centre back neck notches of the body and the lining.

20.1
Turn the layers back on each other to sit RIGHT SIDES TOGETHER.

20.2
Secure with a pin.

20.3
Then continue to work your way around towards the shoulder and the front neck pulling the layers to sit RIGHT SIDES TOGETHER. Similar to the burrito method, you’ll be enclosing most of the garment in a small area.

21
Pin from the centre back all the way down to the notch shown in the diagram (refer to written instructions). Then carefully stitch from the centre back neck to the notch at 1cm.

21.1
Add some small snips in the seam allowance of the back neck to help the curve lay flat.

21.2
Then mitre the corners of the centre front openings and the bottom hem point.

21.3
Flip the waistcoat the right way out.

21.4
This is the garment with one side completed. Then repeat the process for the other side.

21.5
Once the second side is turned out the right way give the whole neckline a good press.

22
Next turn the waistcoat inside out. Pin the bottom hem closed, leaving a 20cm gap in the centre back. You can mark the gap with chalk to remind you not to sew this section closed. Then stitch along the bottom hem at 1cm, stopping at the gap and starting again afterwards.

22.1
Turn the waistcoat through the gap and press the hem. When you get to the gap press the seam allowances up as if that section is already sewed shut - this will help with slip stitching in the next step.

23
Using a thread and needle, sew the gap closed by sewing on the inside edge of the seam allowances on each side.